
Proper Smoke Alarm Installation Steps
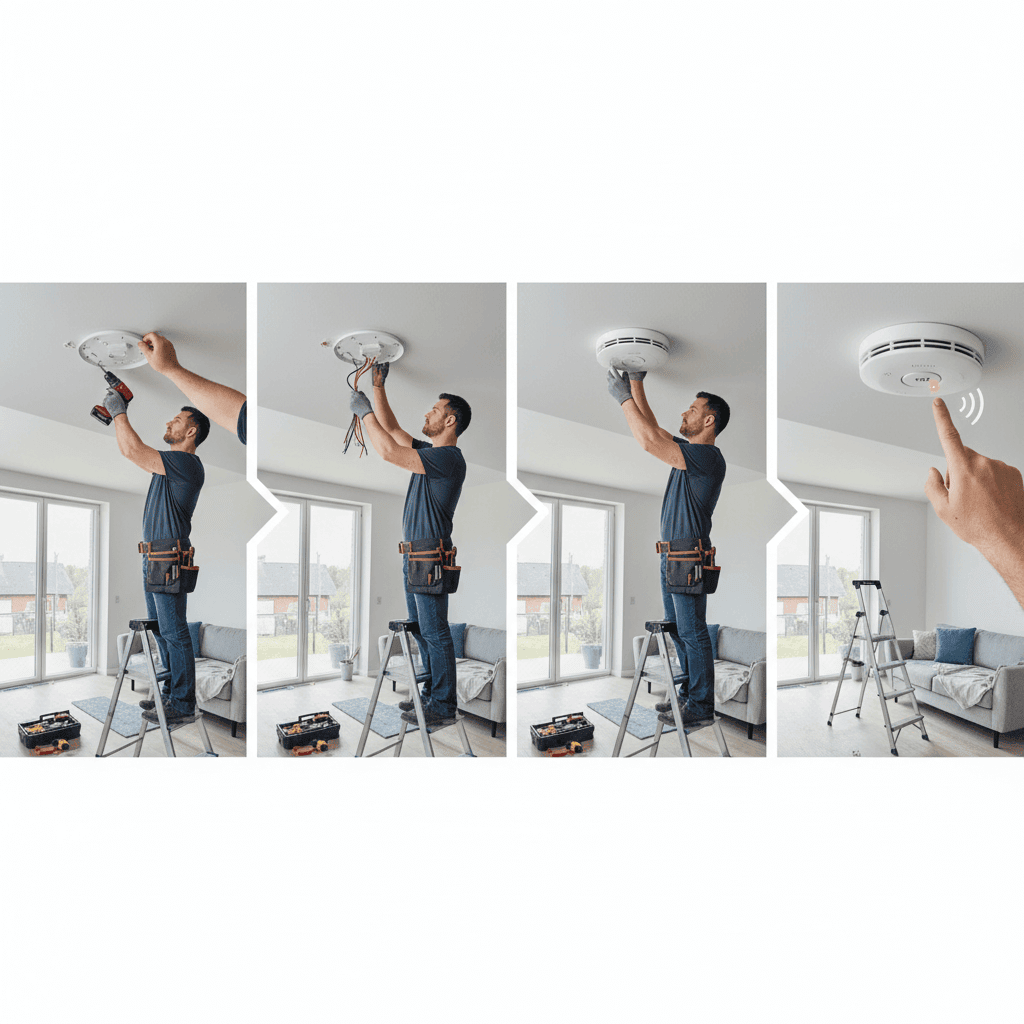
Installing smoke alarms is one of the simplest home safety improvements with the largest impact. A properly placed and installed alarm can detect a developing fire early and give occupants crucial time to exit. This article walks through the proper smoke alarm installation steps so you can make sound choices and take action with confidence.
Whether you are replacing old units or fitting alarms in a new home, the right process matters. I will cover planning, tools, step by step instructions for common alarm types, placement guidance, testing, maintenance, and when to call a professional. Practical tips and examples will help you avoid common missteps and keep your household safer.
Why following proper smoke alarm installation steps matters
Smoke alarms that are installed incorrectly can fail when they are needed most. Common faults include poor placement, dead batteries, and loose electrical connections. Each of these problems reduces detection time and raises risk. By following established steps you reduce the chance of false alarms while improving detection coverage across living spaces.
Regulatory guidance and local building codes set minimum requirements for alarm type and placement. Meeting those rules also makes it easier to pass inspections and to satisfy insurance requirements. Beyond compliance, proper installation reduces maintenance time and helps alarms perform reliably over years of service.
Pre-installation planning and tools you will need
Before you begin, plan where alarms will go and gather the needed tools. A small investment of time up front makes installation faster and reduces the chance of mistakes.
- Tools checklist A screwdriver set, drill with bits for the wall or ceiling material, a ladder that reaches three feet above the mounting location, pencil, tape measure, and a stud finder if mounting on walls or ceilings with joists.
- Materials The alarms, mounting hardware that comes with them, replacement batteries if battery powered, and wire nuts for hardwired installations.
- Documentation Keep manufacturer instructions on hand. Each model has specific recommendations for wiring, distance from walls, and cleaning.
Selecting the right type and number of alarms
There are two main types of residential alarms to consider. Battery powered units are versatile and simple to install in locations without existing wiring. Hardwired alarms tie into the home electrical system and typically include battery backup. Interconnected alarm systems increase safety by sounding every alarm in the home when one detects smoke.
General guidance recommends one alarm outside each sleeping area, one on every level of the home, and one inside each bedroom for occupants who sleep with doors closed. In kitchens place alarms at a safe distance to reduce nuisance trips from cooking fumes.
Step by step installation process
Follow these steps for a reliable installation. Read the device manual first and confirm that local code is satisfied by your plan.
Battery powered alarms
- Choose an appropriate location on the ceiling or high on the wall. The top of a stairwell or hallway outside sleeping areas is often ideal.
- Mark the mounting plate locations with a pencil. Use the mounting template if provided.
- Drill pilot holes if required and fasten the mounting plate securely to the surface. Make sure the plate is flush and stable.
- Insert batteries and test the unit using the test button while the mounting plate is detached to confirm the alarm sounds.
- Mount the alarm on the plate until it clicks or locks in place. Verify that the unit is seated properly and run the test sequence again with the alarm mounted.
Hardwired alarms with battery backup
- Turn power off at the breaker for the circuit you will be working on. Confirm the circuit is dead using a noncontact voltage tester.
- Remove the old alarm if present. Note how the wiring is connected and take a photo for reference.
- Connect wires according to the manufacturer instructions. Typically you will join like colored wires with wire nuts and connect a ground wire as required. Tight, clean connections reduce the risk of future failures.
- Secure the mounting plate and the alarm housing. Restore power and test the unit. If alarms are interconnected, verify that triggering one unit causes the others to sound.
- If you are uncomfortable working with household wiring, hire a licensed electrician to do the wiring portion of the job.
Placement rules and safety practices
Correct placement increases the likelihood that a developing fire is detected early without producing false alarms from cooking or steam. Follow these placement rules for the best coverage.
- Mount alarms on the ceiling at least 4 inches away from where the ceiling and wall meet or on the wall between 4 and 12 inches below the ceiling.
- Place alarms in each bedroom and outside sleeping areas in the immediate vicinity of bedrooms.
- Install an alarm on every level of the home including the basement. For basements mount the alarm on the ceiling at the bottom of the stairs.
- Avoid installing alarms in kitchens within 10 feet of cooking appliances to reduce nuisance alarms. If cooking alarms are a frequent issue consider a photoelectric alarm which is less sensitive to small cooking fumes.
- Do not place alarms near windows, doors, or ducts where drafts can interfere with sensing. Keep units at least 3 feet from air vents.
Testing and maintenance schedule to keep alarms reliable
Once installed, routine testing and maintenance keeps alarms functioning over time. A simple schedule helps you stay on track and prolongs the life of each unit.
- Test alarms monthly using the built in test button. Walk through the house and press the test on each device to confirm it sounds.
- Replace batteries at least once a year for battery powered units. For alarms with sealed long life batteries follow the manufacturer timeline, often 10 years.
- Clean alarms every six months by vacuuming gently around the vents or using compressed air to remove dust. Avoid harsh chemicals.
- Replace smoke alarms every 10 years or as recommended by the manufacturer. Sensor sensitivity declines with age.
Common installation mistakes and how to avoid them
Being aware of frequent errors helps you sidestep them. Here are common pitfalls observed by installers and homeowners.
- Mounting too low on a wall or blocking alarms with furniture or decorations. Alarms must have clear air access.
- Using incorrect batteries or mixing old and new batteries. Always use the battery type the unit calls for and replace all batteries at the same time.
- Failing to test after installation. A newly mounted alarm should be tested immediately to confirm proper operation.
- Skipping documentation and wiring diagrams for hardwired systems. Take a photo of existing wiring before removing an old unit to prevent miswiring.
- Placing alarms too close to kitchens and bathrooms which causes frequent false alarms and may lead occupants to disable the device.
When to hire a licensed electrician and how to choose one
For hardwired installations or complex interconnect systems hire a licensed electrician. A professional guarantees the electrical work meets code and reduces the chance of wiring mistakes that could prevent alarms from operating.
If you prefer to have an expert handle installation look for local firms with good reviews and appropriate licensing. For quick reference on quality providers and professional smoke alarm guidance search resources that list local electricians and residential alarm services. For instance this page contains useful regional recommendations and additional smoke alarm install tips you may want to consult before scheduling a service
Final checks and practical tips before you finish
Before completing the job walk the property and run through a final checklist. Confirm every installed alarm has been tested, that interconnect systems perform properly, and that homeowners know how to silence nuisance alarms and replace batteries.
- Label alarms with installation date and battery replacement date for future reference.
- Show household members where alarms are located and how to test them.
- Keep a small ladder and spare batteries in an accessible location for routine maintenance.
- If your home has special needs such as hearing impaired occupants consider alarms with visual strobes or units that connect to alerting devices.
Proper smoke alarm installation steps reduce risk and make a measurable difference in safety for everyone living in a house. By planning placement, following manufacturer wiring instructions, testing routinely, and avoiding common mistakes you create a reliable early warning system. If you are unsure about wiring or want a professional to install an interconnected system seek a licensed electrician. For regional recommendations and a quick reference on professional services check out these smoke alarm install tips
Conclusion summary and next actions
Following the proper smoke alarm installation steps is a simple way to raise household safety. Start by surveying sleeping areas and niveles of the home. Gather the right tools and follow the manufacturer instructions closely. Choose battery powered alarms when running wiring is impractical and hardwired units when you want interconnected performance. Maintain a schedule of monthly testing and periodic cleaning to keep devices reliable. Avoid common mistakes such as placing units too close to cooking areas and mixing battery types. When electrical work is involved hire a licensed electrician to make certain the wiring meets local rules and functions correctly.
Take action now by mapping alarm locations in your home and checking the age and battery condition of existing units. If any alarms are older than ten years replace them. If you plan to upgrade to an interconnected system and prefer a professional to handle the wiring reach out to a licensed electrical contractor. A small effort today improves safety for years to come and gives your household better protection against fire.